Unit Testing
Unit Testing in ASP.NET MVC
Unit testing is a software testing technique in which individual units of source code are tested independently to verify that they work as expected.
A unit is the smallest testable part of an application:
In procedural programming, a unit is typically a function or procedure
In object-oriented programming, a unit is usually a class or an individual method
Unit testing is commonly automated, though it can also be performed manually.
Goals of Unit Testing
The main goals of unit testing are:
To verify that each unit behaves exactly as expected
To detect bugs early in the development process
To ensure reliability before integrating units into larger modules
To simplify debugging and maintenance
Each unit is tested in isolation before being combined with other parts of the application.
Example
Lets take a look at a simple example of unit testing in which we create a new ASP.NET MVC application with Unit Testing.
Step 1 − Open the Visual Studio and click File → New → Project menu option.
A new Project dialog opens.
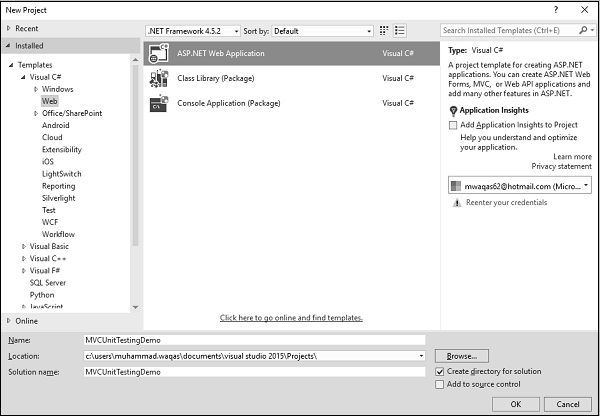
Step 2 − From the left pane, select Templates > Visual C# > Web.
Step 3 − In the middle pane, select ASP.NET Web Application.
Step 4 − Enter the project name MVCUnitTestingDemo in the Name field and click Ok to continue. You will see the following dialog which asks you to set the initial content for the ASP.NET project.
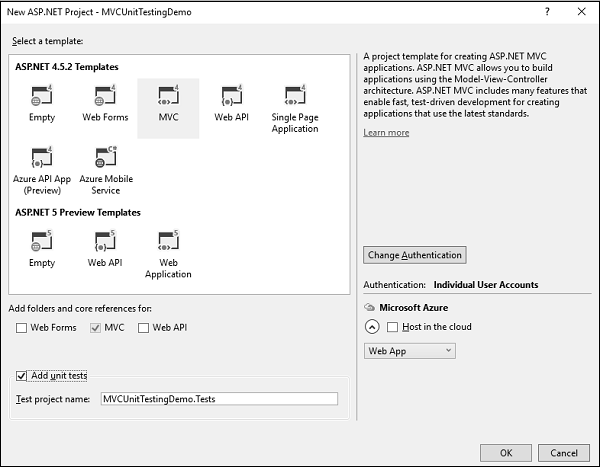
Step 5 − Select the MVC as template and dont forget to check the Add unit tests checkbox which is at the bottom of dialog. You can also change the test project name as well, but in this example we leave it as is since it is the default name.
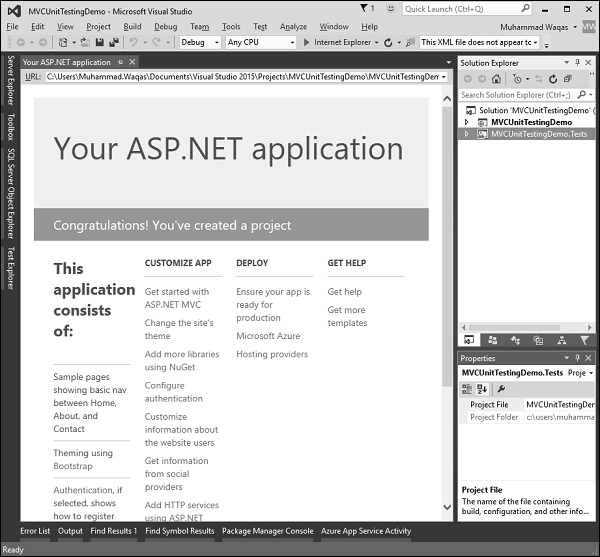
Once the project is created by Visual Studio, you will see a number of files and folders displayed in the Solution Explorer window.
Step 6 − You can see that two projects are there in the solution explorer. One is the ASP.NET Web project and the other is the unit testing project.
Step 7 − Run this application and you will see the following output.
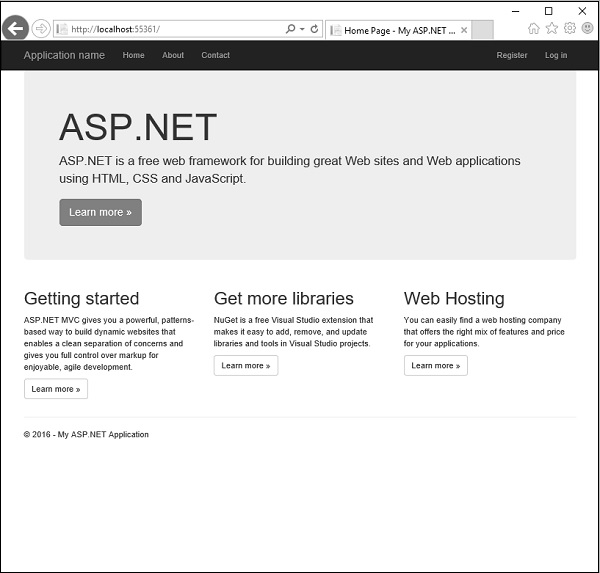
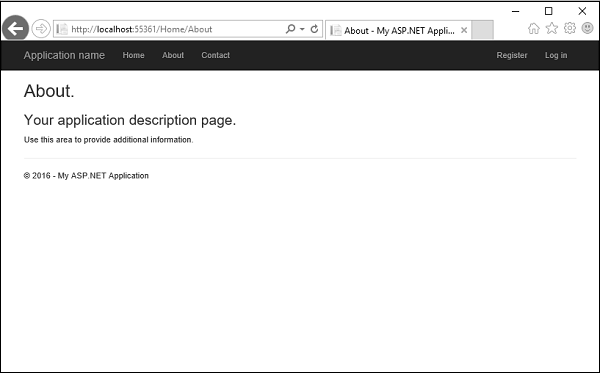
As seen in the above screenshot, there are Home, About and Contact buttons on the navigation bar. Lets select About and you will see the following view.
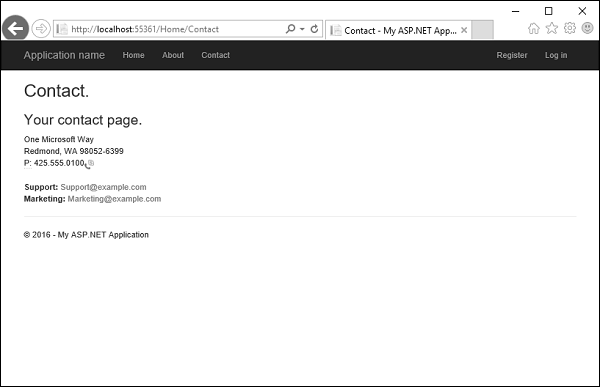
Lets select Contact and the following screen pops up.
Now lets expand the MVCUnitTestingDemo project and you will see the HomeController.cs file under the Controllers folder.
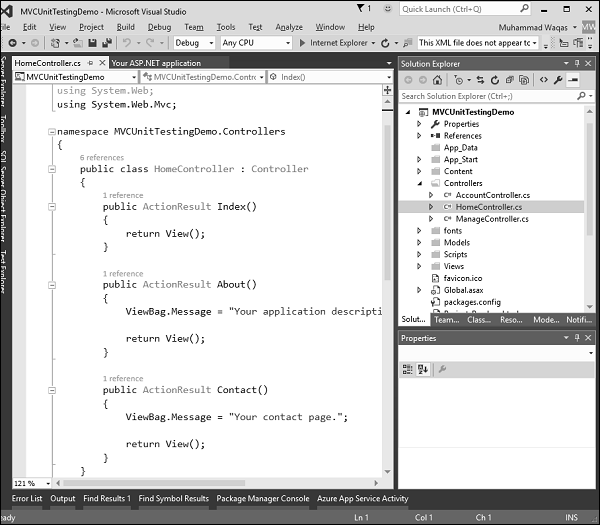
The HomeController contains three action methods as shown in the following code.
using System; using System.Collections.Generic; using System.Linq; using System.Web; using System.Web.Mvc; namespace MVCUnitTestingDemo.Controllers { public class HomeController : Controller{ public ActionResult Index(){ return View(); } public ActionResult About(){ ViewBag.Message = "Your application description page."; return View(); } public ActionResult Contact(){ ViewBag.Message = "Your contact page."; return View(); } } }
Lets expand the MVCUnitTestingDemo.Tests project and you will see the HomeControllerTest.cs file under the Controllers folder.
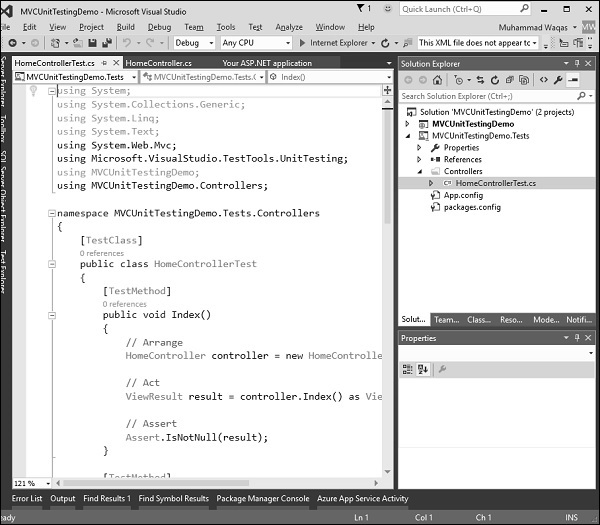
In this HomeControllerTest class, you will see three methods as shown in the following code.
using System; using System.Collections.Generic; using System.Linq; using System.Text; using System.Web.Mvc; using Microsoft.VisualStudio.TestTools.UnitTesting; using MVCUnitTestingDemo; using MVCUnitTestingDemo.Controllers; namespace MVCUnitTestingDemo.Tests.Controllers{ [TestClass] public class HomeControllerTest{ [TestMethod] public void Index(){ // Arrange HomeController controller = new HomeController(); // Act ViewResult result = controller.Index() as ViewResult; // Assert Assert.IsNotNull(result); } [TestMethod] public void About(){ // Arrange HomeController controller = new HomeController(); // Act ViewResult result = controller.About() as ViewResult; // Assert Assert.AreEqual("Your application description page.", result.ViewBag.Message); } [TestMethod] public void Contact(){ // Arrange HomeController controller = new HomeController(); // Act ViewResult result = controller.Contact() as ViewResult; // Assert Assert.IsNotNull(result); } } }
These three methods will test whether the Index, About and Contact action methods are working properly. To test these three action methods, go to the Test menu.
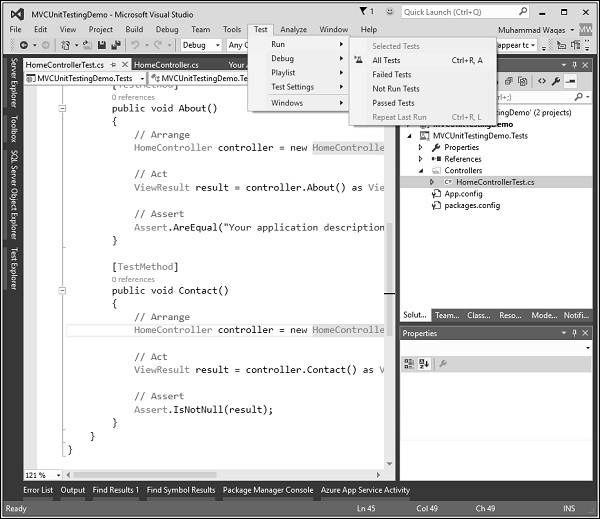
Select Run → All Tests to test these action methods.
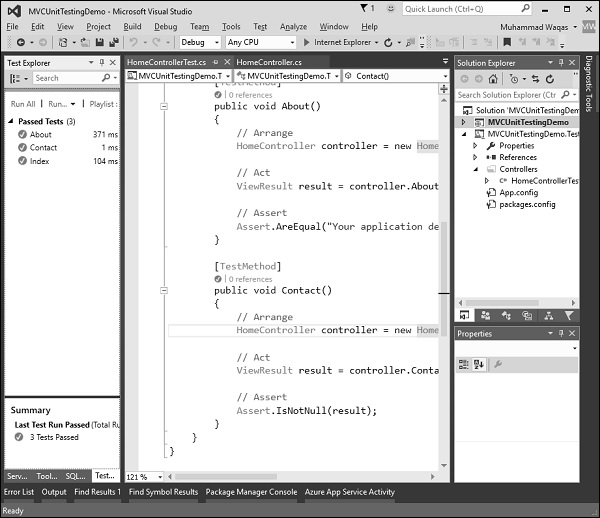
Now you will see the Test Explorer on the left side in which you can see that all the tests are passed. Let us add one more action method, which will list all the employees. First we need to add an employee class in the Models folder.
Following is the Employee class implementation.
using System; using System.Collections.Generic; using System.Linq; using System.Web; namespace MVCUnitTestingDemo.Models{ public class Employee{ public int ID { get; set; } public string Name { get; set; } public DateTime JoiningDate { get; set; } public int Age { get; set; } } }
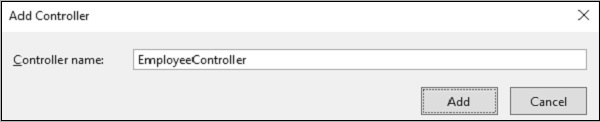
We need to add EmployeeController. Right-click on the controller folder in the solution explorer and select Add → Controller.
It will display the Add Scaffold dialog.
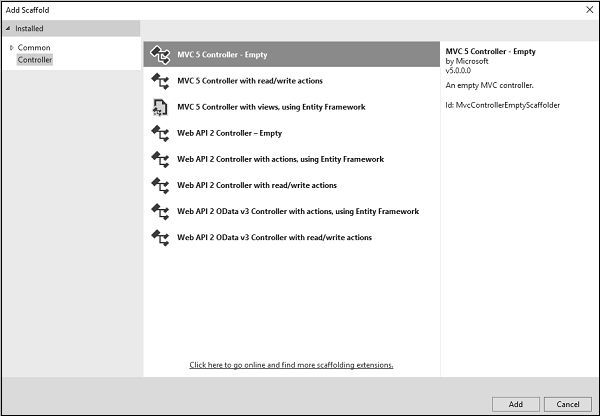
Select the MVC 5 Controller Empty option and click Add button and the Add Controller dialog will appear.
Set the name to EmployeeController and click Add button.
You will see a new C# file EmployeeController.cs in the Controllers folder which is open for editing in Visual Studio. Lets update the EmployeeController using the following code.
using MVCUnitTestingDemo.Models;
using System;
using System.Collections.Generic;
using System.Linq;
using System.Web;
using System.Web.Mvc;
namespace MVCUnitTestingDemo.Controllers {
public class EmployeeController : Controller{
[NonAction]
public List
To add View for Employees action method, right-click on Employees action and select Add View
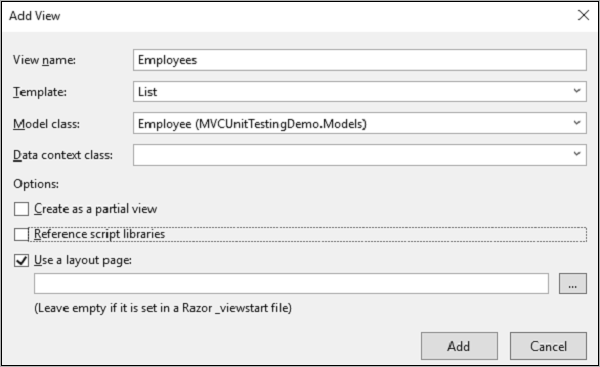
You will see the default name for view. Select List from the Template dropdown and Employee from the Model class dropdown and click Ok.
Now we need to add the link Employees list, lets open the _layout.cshtml file which is under Views/Shared folder and add the link for employees list below the Contact link.
Following is the complete implementation of _layout.cshtml.
To test Employees action method from the Employee controller, we need to add another test method in our unit testing project. Following s the EmployeeControllerTest class in which we will test the Employees action method.
[TestClass] public class EmployeeControllerTest{ [TestMethod] public void Employees(){ // Arrange EmployeeController controller = new EmployeeController(); // Act ViewResult result = controller.Index() as ViewResult; // Assert Assert.IsNotNull(result); } }
Select Run → All Tests from the Test menu to test these action methods.
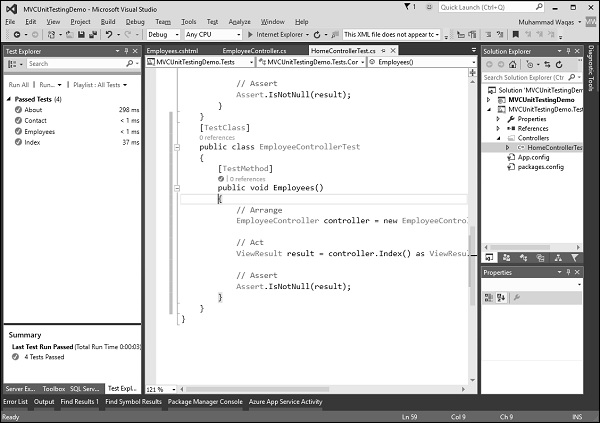
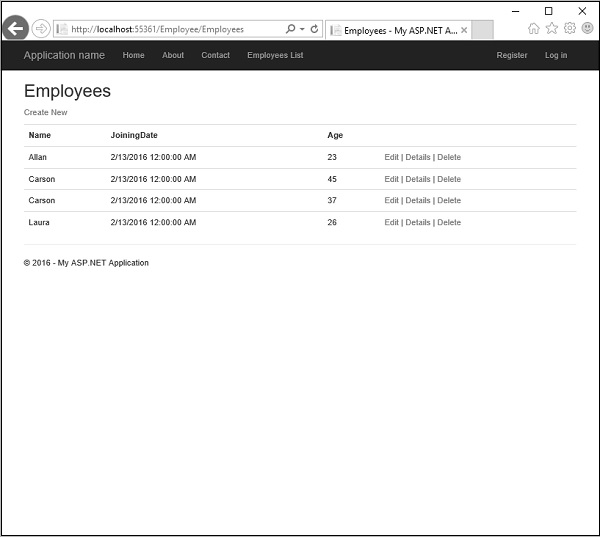
You can see that the Employees test method is also passed now. When you run the application, you will see the following output.

Click Employees List option in the navigation bar and you will see the list of employees.